10 Easy Steps to Level Your Gun Safe
Many gun owners know the challenge of keeping their safe perfectly level. It’s a common issue — over time, safes can shift or settle, making access and safety a concern. You’re not alone in wanting to get it just right.
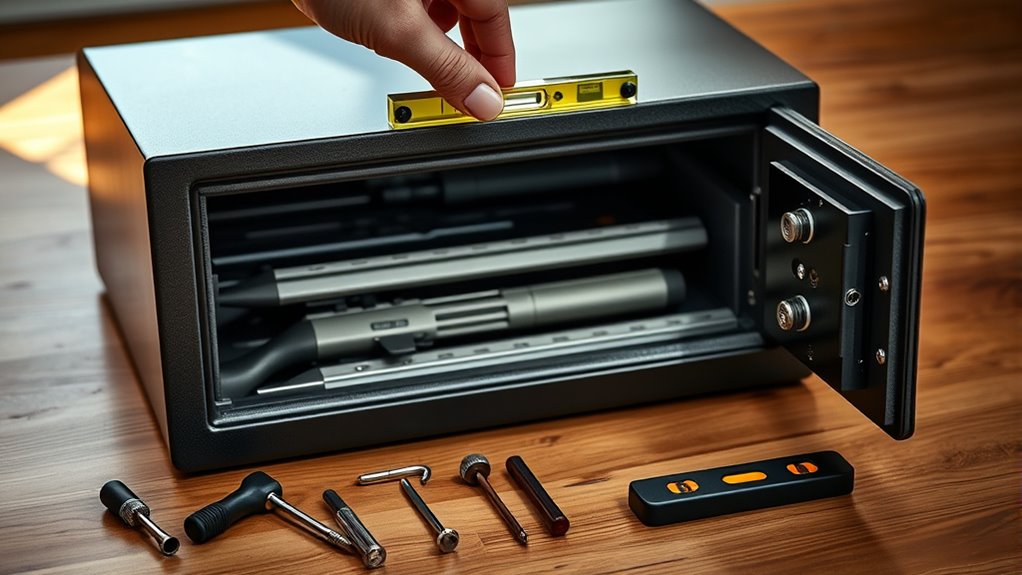
To level your gun safe, start by clearing the area and removing items inside. Use a bubble level to check the safe’s current position in multiple spots. Mark any uneven areas and adjust the adjustable feet or add shims to correct the tilt.
Recheck the level, tighten all fasteners, and secure the safe to the floor for stability. Keep an eye on the safe over time for shifts or issues, and learn more about perfecting the process.
Key Takeaways
- Clear the area and remove items inside to lighten the safe for easier adjustment.
- Use a bubble level on multiple surfaces to identify uneven spots and mark them.
- Adjust the safe’s leveling feet or add shims to correct tilt increments.
- Recheck the level frequently, making small adjustments until the safe is perfectly balanced.
- Secure the safe to the floor or wall and tighten all fasteners after leveling.
Why Leveling Your Gun Safe Matters
Leveling your gun safe is essential because an uneven surface can compromise its stability and security. When your safe isn’t level, it might wobble or shift over time, increasing the risk of accidental tipping or damage.
This instability can also make it easier for someone to tamper with or steal your firearms, especially if the safe moves during attempted forced entry. Proper leveling guarantees the safe sits firmly on the floor, preventing unnecessary wear on hinges or locking mechanisms.
Furthermore, a level safe helps keep doors aligned, making them easier to open and close smoothly. Ultimately, leveling your safe guards both your firearms and your peace of mind, ensuring it remains secure and functional for years to come.
Prepare Your Gun Safe for Leveling
Before leveling your gun safe, clear the area around it to prevent accidents.
Remove all items inside to make the safe lighter and easier to adjust.
Then, check the surface where the safe will sit to ensure it’s flat and stable for accurate leveling.
Clear the Safe Area
To guarantee a smooth leveling process, start by clearing everything from your safe’s interior and surrounding area. Remove all firearms, accessories, and loose items to prevent obstacles and accidental damage.
Clear the space around your safe so you have enough room to work comfortably and safely. This also helps you easily access the safe’s base and spot any uneven spots or debris that could get in the way.
Make sure the floor underneath and around the safe is free of clutter, dust, or objects that could affect stability. A clean, unobstructed space gives you a clear view of the safe’s base, making it easier to see any unevenness.
Taking this step now saves you time and effort during the actual leveling process.
Remove All Items
Empty out your gun safe completely, removing all firearms, magazines, accessories, and loose items. Clearing the space guarantees nothing gets in the way of leveling the safe and prevents damage during the process.
Lay everything aside in a safe spot so you won’t forget or lose any items. Taking out all contents also helps you see the entire interior clearly, making it easier to spot uneven spots or potential issues.
Once empty, double-check that nothing remains inside. Clearing the safe is an essential first step. Without it, you risk damaging your belongings or making the leveling process more complicated.
This simple step ensures a clean, unobstructed surface to work on, setting a solid foundation for a safe, proper leveling.
Inspect the Surface
Once you’ve cleared out the safe, take a close look at the surface to make sure it’s suitable for leveling. Check for any uneven spots, warping, or damage that could affect stability.
A warped or damaged surface can cause the safe to wobble even after leveling, so it’s important to spot and fix these issues beforehand. Use a straightedge or level tool to scan the surface for irregularities.
If you notice significant imperfections, consider placing a sturdy, flat material like a plywood sheet under the safe to create a level base. Making sure the surface is smooth and even will make the leveling process much easier and keep your gun safe secure and stable.
Check the Current Level With a Bubble Level
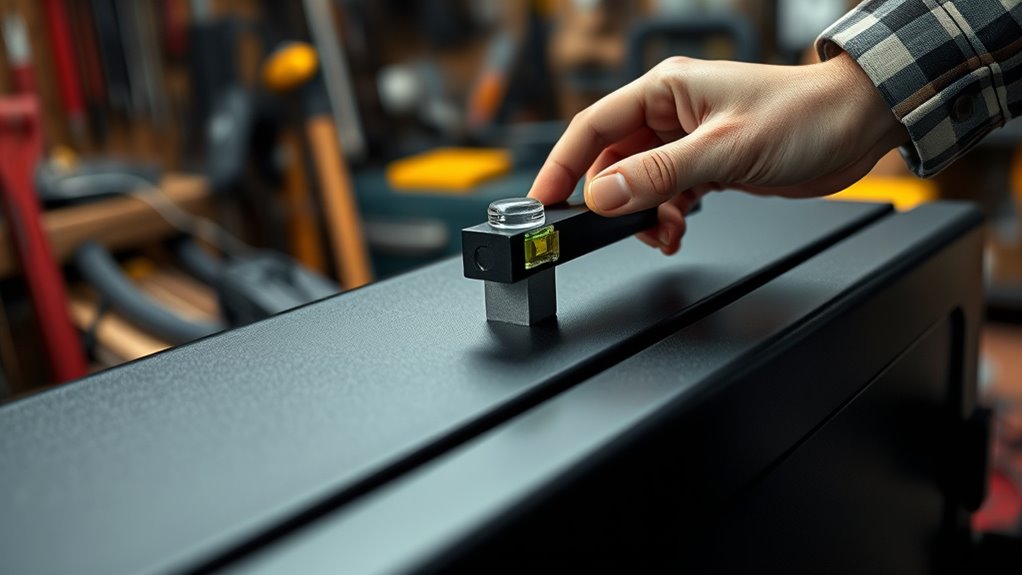
Before you start adjusting your gun safe, it’s important to check if it’s already level with a bubble level. Place the level on a flat surface of the safe, like the top or a shelf.
Make sure the bubble is centered between the marked lines. If it’s off-center, your safe isn’t level. Move the safe slightly and recheck until the bubble is perfectly in the middle.
It’s a good idea to check in multiple directions—front to back and side to side—to confirm the overall levelness. This initial step saves you time and prevents unnecessary adjustments.
Identify and Mark Uneven Spots
To effectively level your gun safe, start by identifying the uneven spots. Place a bubble level on different areas of the surface. Notice where the bubble isn’t centered—that’s where the uneven spots are.
Mark these spots with painter’s tape or a pencil so you remember them later. This helps you see clearly where adjustments are needed. Use the table below to organize your findings:
| Spot Location | Level Status | Marked As |
|---|---|---|
| Front Left | Uneven | Tape on corner |
| Front Right | Slightly off | Pencil mark |
| Back Left | Slightly off | Tape on corner |
| Back Right | Level | No mark |
Marking these areas makes the adjustment process clearer and more precise.
Adjust the Safe’s Feet or Base to Level It
Start by inspecting the adjustable feet or base of your safe, as these are typically designed to help level it. If your safe has adjustable feet, look for small bolts or screws at the bottom. Use a wrench or pliers to turn these clockwise or counterclockwise to raise or lower each corner.
If your safe has a solid base, check for shims or leveling pads underneath and adjust accordingly. As you make adjustments, frequently check the level with a carpenter’s level or bubble level.
Make small, incremental changes to avoid overcorrecting. Once you see the bubble centered, your safe is properly leveled. Tighten any bolts securely to prevent shifting over time.
Proper adjustment guarantees stability and safety for your valuables.
Use Shims to Fine-Tune the Level
Shims are a simple and effective way to make precise adjustments once your safe is roughly level. If it still leans slightly, place shims under the higher side to fine-tune its position.
Use thin pieces of wood, cardboard, or metal shims, and insert them gradually until the safe is perfectly level. Tap the shims gently to settle them in place and make sure they don’t shift.
Check the level often with a spirit level as you make adjustments. Be careful not to over-shim, which could cause instability.
Once the safe sits evenly, remove any excess material and verify the level one last time. Using shims helps you achieve a stable, balanced safe without needing to move or readjust everything.
Recheck the Level and Make Final Adjustments
You should verify that the level is accurate using a reliable tool, like a spirit level, to guarantee precision.
If needed, adjust the mounting points to correct any imbalance. Always use proper tools to make these final tweaks for a secure and level safe.
Verify Level Accuracy
Once you’ve made initial adjustments, it’s crucial to recheck the level to confirm your safe is perfectly positioned. Use a reliable spirit level or digital level on multiple points of the safe’s top and front surfaces.
Place the level in different spots to verify consistency, not just one point. If the bubble isn’t centered, gently tap or shift the safe as needed, then recheck.
Don’t rush this step—precision matters. Confirm that the safe remains stable and doesn’t shift during rechecking. Small deviations can affect the safe’s stability and security.
Once the bubble stays centered in all positions, you know the safe is truly level. This final check guarantees your safe is securely and accurately positioned for long-term safety and functionality.
Adjust Mounting Accordingly
After verifying the initial level, it’s time to recheck the safe’s position and make any final adjustments needed. Carefully observe how the safe sits on its mounting surface. If it’s slightly off, loosen the mounting bolts or brackets a bit, then shift the safe until it’s perfectly level.
Tighten the bolts securely once the safe is aligned. Avoid over-tightening, which could warp or damage the mounting points. Use your hands or a wrench for precise adjustments, making sure the safe stays stable.
Double-check the level after each tweak to confirm it’s exactly right. Small, incremental adjustments make a big difference. Once you’re satisfied, tighten all fasteners firmly, and give the safe a gentle shake to confirm it’s securely mounted and perfectly level.
Use Proper Tools
To guarantee your safe is perfectly level, using the right tools is essential during the final adjustments. A quality spirit level or digital level is your best choice for accuracy.
Place the tool on different sections of the safe’s surface to check for levelness from multiple angles. If you notice any tilts, use shims or adjustable feet to correct them.
For precise readings, consider a laser level that projects a straight line across the safe’s surface. Always double-check your measurements after making adjustments.
Avoid guessing or relying on visual cues alone, as small misalignments can compromise safety. Using proper tools guarantees you achieve a perfectly level safe, providing peace of mind that your guns and valuables are stored securely.
Secure Your Gun Safe Once It’s Level
Securing your gun safe after leveling it is crucial to prevent theft or accidental tipping. Once the safe is perfectly level, anchor it to the floor or wall using the right brackets or bolts.
Choose mounting points carefully to ensure maximum stability without damaging the safe or the surrounding area. Drill holes into the safe’s base or sides, then insert heavy-duty anchors or bolts to secure it tightly.
Make sure everything is tightened well and there’s no wobbling or movement. This helps stop anyone from easily tipping or removing the safe.
Maintain Your Gun Safe’s Level Over Time
Even if your gun safe is securely anchored, it’s important to regularly check that it remains level over time. Shifts can happen due to foundation settling, temperature changes, or minor vibrations.
To keep your safe properly balanced, periodically use a level to check its position. If you notice it’s off, recheck its anchoring and make adjustments as needed.
Tighten any loose bolts or screws that may have loosened over time. Don’t ignore small shifts, as they can cause stress on the safe’s structure or compromise its security.
Make routine inspections part of your maintenance schedule—every few months or after significant weather changes. Staying proactive helps preserve your safe’s stability, protect your valuables, and ensure safe, reliable access whenever you need it.
Troubleshoot Common Issues When Leveling Your Safe
If your safe isn’t perfectly level, start by checking if the surface it’s sitting on is even. Sometimes, the floor or the spot might be uneven, causing the tilt.
You might need to adjust the leveling feet to fix any tilt. Just turn them until the safe sits evenly and feels stable.
Troubleshooting these common issues helps keep your safe steady and secure. It’s a simple step to ensure everything is safe and sound.
Identifying Uneven Surfaces
Before you start leveling your gun safe, it’s important to check if the surface it sits on is uneven. Place a level on different parts of the safe’s top to see if it tilts in various directions. If the bubble isn’t centered, that means the surface isn’t level.
You can also use a straightedge or a ruler across the base to find high or low spots. Look for uneven gaps between the safe and the surface underneath. Sometimes, the floor or platform might look flat but actually have dips or bumps.
Finding these issues early helps you figure out if the problem is with the surface itself. You might need extra support or adjustments before you start leveling.
Adjusting Leveling Feet
Adjusting the leveling feet is usually the easiest way to fix unevenness in your gun safe, but it can sometimes be tricky. You might struggle to turn the feet if they’re stuck or corroded, especially if they haven’t been adjusted in a while.
To fix this, spray the feet with a lubricant like WD-40 and wait a few minutes. Use a wrench or pliers for a better grip if needed, but be careful not to over-tighten or damage the threads.
Make small adjustments and check the level often. If a foot won’t budge, you may need to replace it. Patience and gentle effort will help you get a stable, level safe without causing damage.
Frequently Asked Questions
Can I Level My Gun Safe on Uneven Flooring?
Yes, you can level your gun safe on uneven flooring. First, use a level tool to find the uneven spots.
Then, place shims or sturdy wedges under the safe’s feet or bottom to create a flat, stable surface. Adjust as needed until the safe is perfectly level.
This helps prevent tipping, reduces stress on the lock mechanism, and keeps your firearms safe and secure.
What Tools Are Best for Adjusting Safe Feet?
You should use a spirit level or bubble level to ensure your safe’s feet are properly adjusted.
A wrench or pliers can help tighten or loosen the feet if they’re threaded.
If your safe has adjustable feet, turn them clockwise to raise or counterclockwise to lower.
For uneven flooring, place shims or small wooden blocks under the feet for extra stability.
These tools make leveling straightforward and effective.
How Often Should I Recheck the Safe’s Level?
Like a trusty alchemist, you should recheck your safe’s level every few months, especially if you notice any shifting or if you move it.
Regular checks guarantee your guns stay secure and your safe functions properly. Environmental factors like humidity or nearby vibrations can affect positioning.
Will Shims Damage My Safe or Floor?
Shims won’t damage your safe or floor if you use them properly. They’re designed to fill gaps and provide stability, so as long as you pick the right type, like wood or plastic shims, and install them carefully, they won’t cause harm.
Just be careful not to over-tighten or force shims into tight spots. Regularly check your setup to make sure everything stays secure and level without risking any damage.
Is Professional Leveling Necessary for Heavy Safes?
Yes, professional leveling is often necessary for heavy safes. When safes are too heavy or unevenly placed, they can shift or become unstable over time, which can cause damage or safety hazards.
Professionals use specialized tools to make sure your safe is perfectly level. This helps prevent issues like misalignment, door problems, or structural stress.
Investing in professional leveling ensures your safe functions properly and stays secure for years, especially if it’s very heavy or loaded with valuables.
Conclusion
Once your gun safe is perfectly level, it’s ready to keep your valuables secure. A stable safe not only protects your belongings but also helps it last longer.
Remember, taking the time to level and secure your safe now can save you headaches down the road. Regularly check its position to ensure it stays in top shape.
Because an ounce of prevention is worth a pound of cure, staying proactive with your safe’s stability is always a smart move.