Mastering Iron Sights Adjustment: A Step-by-Step Guide
Many gun owners know the frustration of trying to get their iron sights just right. It can feel overwhelming, especially when shots aren’t hitting where you want them to. You’re not alone—mastering iron sights adjustment is a common challenge for shooters at every level.
To master iron sights adjustment, start by understanding how your sights align with your target and guarantee they are clean and properly maintained.
Use the right tools, like screwdrivers and punches, to make precise windage and elevation adjustments based on your shot patterns. Test your accuracy with multiple shots and fine-tune as needed, avoiding common mistakes like over-adjusting.
If you keep focusing on these steps, you’ll develop the skill needed to achieve consistent, accurate shots every time.
Key Takeaways
- Understand the components of iron sights and make sure they are clean and properly maintained before making any adjustments.
- Use the right tools, like screwdrivers and punches, to get precise windage and elevation adjustments.
- It’s a good idea to do a test fire first. This helps you see how your sights are aligned and if there are any shot pattern issues or misalignments.
- When making adjustments, go small. Make tiny, incremental changes to windage and elevation, then test again to see how it affects your aim.
- If you run into trouble, try cleaning the adjustment screws. It’s also worth checking that the sight is compatible with your firearm to prevent damage and keep everything working smoothly.
Understanding How Iron Sights Work
Iron sights are simple but effective tools for aiming your firearm. They help you line up your gun with your target.
Iron sights provide a straightforward, reliable way to align your firearm with your target.
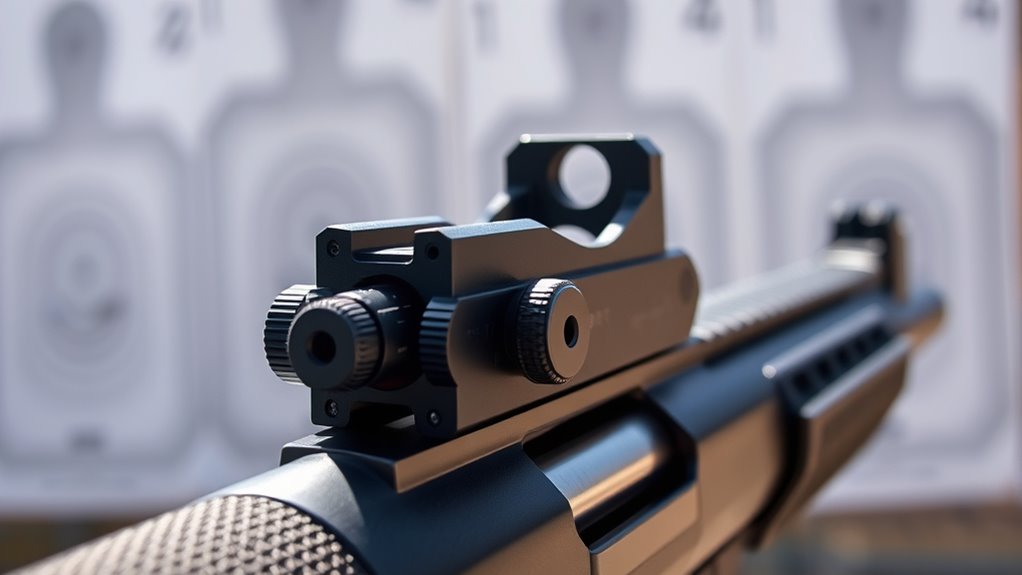
They have two main parts: the front sight, which is usually a blade or post, and the rear sight, which features a notch or an aperture.
When you look through the rear sight, you want to line up the front sight within the notch. Make sure it’s centered and level.
Your goal is to create a straight line from your eye, through the rear sight, to the front sight, and then to your target.
Getting this basic setup right is key to shooting accurately. Iron sights depend on your eye’s alignment, not complex optics.
That makes them reliable and easy to use, especially in different lighting conditions.
Tools You Need to Adjust Your Iron Sights
To make precise adjustments to your sights, you’ll need a few essential tools. First, a small flat-head or Phillips screwdriver is often required for windage and elevation screws, depending on your firearm’s design.
A punch tool or a brass drift can help gently tap sights into position without damaging them. A magnifying glass or good flashlight helps you see small screws clearly.
Some guns might need a specialized sight adjustment tool, which fits the adjustment screws perfectly. A clean cloth or brush is useful to remove dirt and debris that could interfere with adjustments.
Additionally, have a pair of tweezers or needle-nose pliers handy for handling tiny screws or parts. With these tools, you’ll be well-equipped to fine-tune your iron sights confidently and accurately.
How to Check If Your Iron Sights Are Properly Aligned
To check if your iron sights are properly aligned, start with a visual inspection of the sights against a distant target. Look for any misalignment or uneven gaps.
Next, fire a few test shots at a target to see if the point of impact matches your aiming point. Keep in mind, your shots might not hit exactly where you aim if the sights are off.
If your shots aren’t hitting where you expect, it’s time to adjust and recheck the alignment. Small tweaks can make a big difference in accuracy.
Visual Alignment Inspection
Begin your inspection by holding your firearm at eye level in a well-lit area. Look down the sights, focusing on the alignment of the front and rear sights.
Check for consistent positioning: the front sight should sit centered within the rear notch, with equal space on both sides. Confirm the top of the front sight aligns evenly with the top of the rear sight.
Any misalignment indicates the sights aren’t properly aligned. Use the table below to evaluate common issues:
| Issue | How It Looks |
|---|---|
| Off-center front sight | Front sight shifted left or right |
| Unequal spacing | Gaps uneven between front and rear |
| Low front sight | Front sight below rear sight line |
| High front sight | Front sight above rear sight line |
| Tilted sights | Sights not parallel to each other |
Proper visual inspection confirms accurate shot placement.
Test Fire Accuracy
Fire a series of test shots at a designated target from a stable shooting position, making sure you keep your aim and trigger control consistent.
Watch where your shots land in relation to your point of aim. If they cluster tightly around the bullseye, your sights are probably well-aligned.
If they’re consistently off-center, take note of the direction of the deviation. This shows how your sights might need adjusting.
Take multiple groups to confirm patterns and avoid misjudging random shot dispersion.
Keep your stance, grip, and trigger pull steady to ensure accuracy. Record where your shots land for future reference.
Once you see a pattern, you can start fine-tuning your sights accordingly.
This process helps you confirm whether your sight adjustments are working or if more calibration is needed.
Step-by-Step: Adjusting Windage and Elevation on Your Iron Sights
To properly adjust your iron sights, you need to understand the difference between windage and elevation. Windage moves the sight left or right, while elevation adjusts it up or down.
Gather the right tools, like a screwdriver or adjustment wrench, to make precise changes. Having the correct tools makes the process easier and helps avoid damage.
Follow the step-by-step process to fine-tune your sights for accurate shooting. Take your time and make small adjustments to get the best possible accuracy.
Understanding Windage and Elevation
Understanding windage and elevation is key for accurate iron sight adjustments, especially when your shots aren’t hitting the target as expected. Windage refers to the horizontal movement of your sight, helping you compensate for wind or bullet drift.
Elevation, on the other hand, adjusts the vertical alignment. It helps you account for distance or bullet drop, making sure your shots stay on target at different ranges.
If your shots are hitting left or right, you’ll need to tweak the windage. If they’re too high or low, then adjusting the elevation is the way to go.
Knowing how these adjustments work allows you to fine-tune your aim. Proper understanding helps you make precise changes, ensuring accuracy across various distances and conditions.
Mastering windage and elevation is crucial for consistent shooting. It’s all about making sure your shots stay on target no matter what.
Tools Needed for Adjustment
Adjusting your iron sights needs a few basic tools to make sure your changes are precise and reliable. First, you’ll want a small, flat-head screwdriver or a specialized sight adjustment tool, depending on your sight type. These tools help turn adjustment screws without slipping or damaging the sight.
A punch or pin punch can come in handy if you’re dealing with stubborn sights or need to push out sight pins when replacing them. Some sights have dials or knobs that you can turn by hand, but using a tool makes sure your adjustments are accurate.
A set of fine-tipped pliers can help hold or stabilize parts if needed. Lastly, a clean cloth or clothespin can keep your work area tidy and stop dirt from getting into the sight components. These tools make your adjustments smoother and more precise.
Step-by-Step Adjustment Process
Once you’ve got the right tools, you can start fine-tuning your iron sights step by step. Begin by aiming at a target at a known distance, preferably with a steady rest for stability.
To adjust windage, turn the sight’s screw or knob left or right, depending on where your shots are hitting. For elevation, turn the screw up or down to raise or lower your point of impact.
Make small, deliberate turns—usually a quarter or half a turn at a time. After each adjustment, fire a few shots to see if your point of impact is closer to your target.
Repeat these steps as needed until your sights are properly aligned for accurate shooting.
How to Test and Fine-Tune Your Sight Adjustments
To make sure your sights are properly aligned, start by shooting a group at a set distance and see where your shots land on the target. If they cluster off-center, pay attention to whether they’re consistently high, low, left, or right. Use this pattern to figure out which way to adjust your sights.
Usually, if your shots hit low, you’ll want to raise your front sight. If they hit left, move the rear sight right. Make small adjustments—about a quarter to half a turn—and shoot another group. Keep repeating this process until your shots hit the bullseye every time.
Fine-tuning your sights helps ensure your firearm shoots exactly where you aim. Remember, patience is key to getting everything aligned just right.
Tips for Keeping Your Iron Sights Accurate and Consistent
Keeping your iron sights accurate and consistent requires regular maintenance and careful handling. Always clean your sights after shooting to remove dirt, dust, and debris that can block your view.
Check for any loose or misaligned parts and tighten or adjust as needed. When storing your firearm, keep it in a safe, dry place to prevent corrosion or damage to the sights.
Use the same shooting stance and grip every time to help maintain accuracy. Try not to touch the sights unnecessarily, as oils or fingerprints can cause misalignment.
Regularly verify your sights’ zero, especially after cleaning or handling. Practice proper sight alignment and focus to stay precise.
Common Mistakes When Adjusting Iron Sights: And How to Avoid Them
Adjusting your iron sights might seem straightforward, but common mistakes can easily throw off your accuracy if you’re not careful. One major error is making adjustments without a proper sight picture, which leads to inconsistent shooting.
Another mistake is turning the adjustment screws too much at once, causing overcorrection. Plus, neglecting to verify your zero after adjustments can give you a false sense of accuracy.
To avoid these pitfalls, consider this table:
| Mistake | Consequence | Solution |
|---|---|---|
| Over-adjusting | Wastes time, inconsistent aim | Make small, incremental adjustments |
| Not confirming zero | Misleading accuracy | Always check after adjustments |
| Ignoring environmental factors | Poor results outdoors | Adjust for wind, lighting, and distance |
Stay precise, steady, and methodical to improve your sight adjustments.
Troubleshooting Difficult-to-Adjust Sights
When sights refuse to cooperate despite your efforts, it can be frustrating and confusing. First, check for dirt, rust, or debris around the adjustment screws or contact points, as these can hinder movement. Use a soft brush or compressed air to clean the area thoroughly.
If screws are stuck or difficult to turn, apply a small amount of lubricant designed for firearms, but avoid overdoing it. Sometimes, the sight may be misaligned or loose; tighten any loose screws carefully without over-tightening, which can strip threads.
If the sight still won’t adjust properly, verify that your sight is compatible with your firearm and not damaged. Persistent issues might require replacing the sight or seeking professional assistance to avoid further damage.
Maintaining Your Iron Sights for Long-Term Accuracy
Regular maintenance is key to keeping your iron sights accurate and reliable over time. Make a habit of inspecting them for dirt, debris, or corrosion that can affect visibility and alignment.
Gently clean your sights with a soft brush or cloth to remove any buildup without damaging the finish. Check for loose screws or fittings and tighten them if needed—loose parts can throw off your aim.
Protect your sights from moisture and corrosion by applying a light coat of oil or a protective spray. Store your firearm in a dry, secure place to prevent rusting or damage.
Regular checks help you catch issues early and keep everything functioning smoothly. Proper care ensures your sights stay in top condition so you can shoot confidently and accurately for years to come.
Frequently Asked Questions
How Often Should I Realign My Iron Sights?
You should realign your iron sights whenever you notice your shots are consistently off target or if you’ve dropped or bumped your firearm.
Regular checks, especially after long shooting sessions or handling, help keep your aim on point.
Don’t wait too long to check, as misaligned sights can lead to poor shooting performance.
Can Weather Conditions Affect Sight Adjustments?
Yes, weather conditions can affect your sight adjustments.
Temperature changes can cause metal parts to expand or contract, which may shift your sights slightly.
Humidity and rain can impact visibility and lead to corrosion over time.
When you shoot in different weather, it’s a good idea to check and fine-tune your sights for accuracy.
Always keep weather in mind as part of your regular maintenance to ensure consistent performance.
Are There Differences for Adjustable vs. Fixed Iron Sights?
Yes, there are differences. With adjustable iron sights, you can fine-tune the elevation and windage, which lets you make precise adjustments based on your shooting conditions.
Fixed sights don’t have this flexibility. You have to rely on their factory alignment, which might not work well for all distances or conditions.
If you need accuracy at different ranges, adjustable sights are a better choice. But if you want something simple and durable for basic use, fixed sights work just fine.
How Do I Distinguish Between Sight Misalignment and Shooter Error?
Imagine your target stays steady, but your shots go all over the place. To figure out if it’s sight misalignment or shooter error, start by checking your sights. Make sure they’re perfectly aligned—look for uneven gaps or wobbling.
Next, focus on your shooting stance, grip, and trigger pull. If your sights stay true but your shots still miss, it’s probably you. But if your shots stay consistent and still miss the mark, then your sights might need realignment.
What Are the Signs My Iron Sights Need Replacement?
If your shots are consistently off even after adjusting your sights, it might be time to check if your iron sights need replacing.
Look for visible damage like dents, cracks, or bent parts. If the sights are loose, misaligned beyond adjustment, or the fiber optics are faded or broken, it’s a sign they need to be replaced.
Also, if your sight picture is blurry or uneven, that indicates worn or damaged sights that make it harder to be accurate.
Conclusion
Mastering iron sights is like fine-tuning a musical instrument—you’ll improve with patience and practice. Keep your sights properly aligned, check regularly, and steer clear of common mistakes.
With each adjustment, you’ll build confidence and precision, turning your firearm into an extension of your aim. Remember, consistency is key. Think of it as sharpening a blade, making sure your shots stay true every time.
Stick with it, and your accuracy will improve dramatically. Mastering iron sights takes time, but the results are well worth the effort.