8 Simple Steps to Align Your Rifle Scope Perfectly
Many shooters know the frustration of trying to get their rifle scope perfectly aligned. It’s a common challenge that can make or break your accuracy in the field or at the range. If you’re struggling with this, you’re not alone—many people find it tricky to achieve that perfect setup.
To align your rifle scope perfectly, start by ensuring both your rifle and scope are clean and securely mounted. Use a bore sight to get on target quickly, then fire a few shots to fine-tune your adjustments.
Make small changes to windage and elevation, and level the scope with a bubble level or tool. Regularly check your mounts and reticle to prevent drift.
Keep practicing your setup, and you’ll learn even more effective techniques along the way.
Key Takeaways
- Make sure your rifle and scope are clean, secure, and properly mounted before you start aligning.
- Using a bore sight can help you quickly get the reticle roughly aligned with the barrel before you shoot.
- Level the scope with a bubble level or leveling tool. This helps prevent tilt errors that can throw off your shots.
- Make small, incremental adjustments to windage and elevation. Check your shot groupings and adjust accordingly.
- Don’t forget to regularly check and tighten your mounts. This prevents scope drift and keeps your alignment on point.
Why Proper Scope Mounting Is Crucial for Accuracy
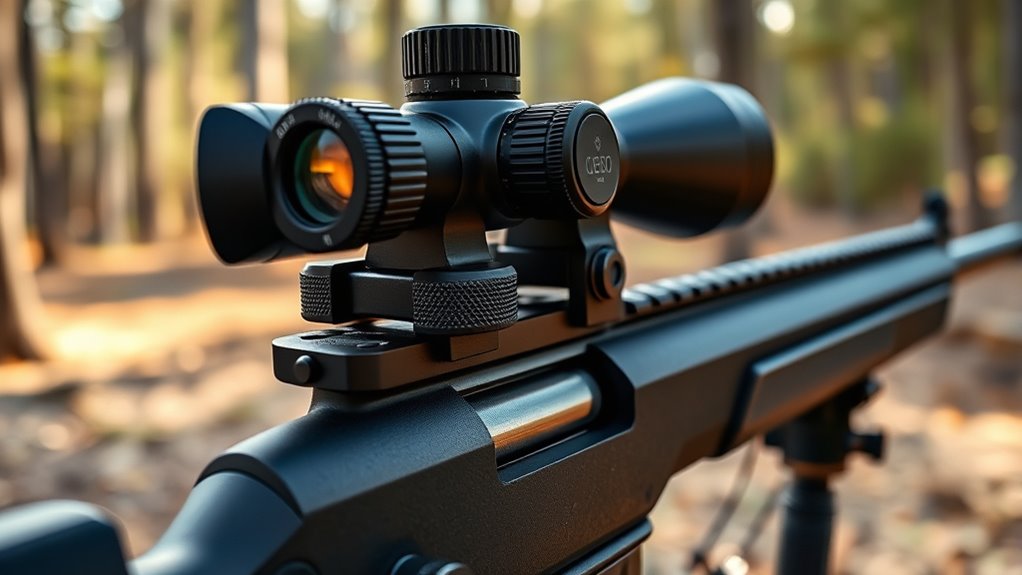
Proper scope mounting is crucial because even a tiny misalignment can really hurt your accuracy. When your scope isn’t securely and correctly mounted, your shots become inconsistent, making it tough to hit your target precisely.
A loose or uneven mount can cause shifts in the reticle, especially when firing multiple rounds or moving through different terrains. If the scope isn’t aligned properly on the rifle, it can lead to parallax errors and make it hard to keep a steady point of aim.
Spending time on proper mounting ensures your scope stays stable and aligned. This gives you more confidence in your shots. Remember, even small errors in mounting can mess with your accuracy, so it’s worth doing it right from the start.
Preparing Your Rifle and Scope for Alignment
Before you start aligning your scope, make sure both your rifle and scope are clean and free of dirt or dust. Dirt can mess with proper mounting and throw off your accuracy.
Next, double-check that your scope is securely mounted on the rings and that all screws are tight. Also, ensure the reticle is centered and the mounting base is level.
Ensure your scope is tightly mounted, the reticle is centered, and the mounting base is perfectly level for accurate alignment.
It’s also a good idea to inspect the rifle’s stock and barrel for stability because any movement can make alignment tricky.
Finally, set up a steady shooting position and ensure your workspace is well-lit. These steps help create a solid foundation for accurate scope alignment.
Taking the time to prepare properly saves you effort later and boosts your chances of getting perfect alignment.
Using a Bore Sight to Quickly Align Your Rifle Scope
Using a bore sight helps you quickly get your scope roughly aligned with your rifle’s barrel. It’s a handy tool that makes the whole process easier and faster.
You’ll learn the basics of bore sighting and the proper technique to guarantee your scope points in the right direction. This step saves you time before fine-tuning your scope at the range.
Bore Sight Basics
Alignment is a key step to make sure your rifle shoots accurately from the start. Bore sight basics help you get your scope roughly lined up before you fire.
To use a bore sight effectively, remove the bolt and insert the device into the chamber or muzzle. Turn it on—most bore sights project a laser or reticle.
Next, adjust your scope’s turrets until the reticle lines up with the laser point or target mark. Make sure the scope is centered and snug in its rings.
Finally, double-check the alignment at different angles to ensure everything stays consistent. Using a bore sight saves you time and ammo, giving you a solid starting point.
Proper Alignment Technique
To quickly align your rifle scope with a bore sight, start by securely mounting the device in your rifle’s chamber or muzzle and turning it on. Look through the scope and adjust the turrets to center the reticle on the bore sight’s target.
Use the following table to guide your adjustments:
| Step | Action | Result |
|---|---|---|
| Confirm bore sight image | Make sure the bore sight’s crosshairs are visible | Clear reference point |
| Adjust elevation | Turn the vertical turret until the crosshairs align vertically | Proper vertical alignment |
| Adjust windage | Turn the horizontal turret until the crosshairs align horizontally | Proper horizontal alignment |
This method guarantees your scope is roughly aligned for precise shooting.
How to Zero Your Rifle Scope for Precise Shots
Zeroing your rifle scope is an important step to make sure your shots hit exactly where you aim.
First, set up a stable shooting position and choose a target at your desired distance. Fire a few shots and see where they land compared to your point of aim.
Observe the pattern of your shots and adjust your scope’s turrets accordingly to move your shots closer to the center of the target. Keep these tips in mind:
- Use a consistent shooting stance and rest
- Fire multiple shots to identify a pattern
- Make small, incremental adjustments
- Record your adjustments for future reference
- Confirm zero by testing at different distances or angles
Patience and precision are key. Once your shots consistently hit the bullseye, your scope is properly zeroed for accurate, reliable shooting.
Adjusting Windage and Elevation for Better Accuracy
To improve your accuracy, you need to fine-tune your windage and elevation settings.
Make small adjustments while checking your target to ensure proper alignment. This helps you hit your mark consistently.
Fine-Tune Windage Settings
Fine-tuning your windage settings helps your rifle shoot accurately left or right of your target. Start by shooting a group at a known distance and see where the shots land relative to your target.
Make small adjustments to the windage knob—usually a click or two at a time. Keep track of each change so you don’t overshoot your mark.
After adjusting, fire another group to check your correction. Consistent shooting and gradual tweaks are the best way to get precise alignment.
- Always make small, incremental changes
- Use a stable shooting position for accuracy
- Record your adjustments for future reference
- Confirm results with multiple shots
- Adjust only when you see consistent drift
Calibrate Elevation Properly
After making precise windage adjustments, it’s important to calibrate your elevation to confirm your rifle hits the target vertically. Start by setting your scope’s elevation turret to zero or the starting point.
Fire a shot at your target from a known distance, then see where your bullet hits relative to the bullseye. If it’s low, turn the elevation turret clockwise to raise your point of impact. If it’s high, turn it counterclockwise.
Make small adjustments—no more than a quarter or half MOA at a time—and shoot again to check your progress. Keep repeating this process until your shots consistently hit your desired point of aim.
Proper elevation calibration ensures your shots are accurate vertically, which boosts your overall precision.
Use Target for Alignment
Using your target as a guide helps you make precise adjustments to windage and elevation, making sure your rifle lines up perfectly with your point of aim. Pay attention to where your shots land in relation to the target’s center.
If your shots hit to the right, turn the windage turret clockwise. If they go to the left, turn it counterclockwise. For elevation, adjust based on whether your shots are high or low.
To fine-tune your scope, start by firing a group and watching where the shots land. Use the windage turret to correct horizontal drift and the elevation turret for vertical shifts.
Make small, incremental turns to ensure accuracy. Keep repeating this process until your shots consistently hit the center of the target.
Leveling Your Scope for Optimal Performance
To make sure your rifle performs accurately at long ranges, it’s really important to level your scope correctly. Start by placing your rifle on a stable surface or shooting rest.
Use a bubble level made for scopes and attach it to the top of your scope or use a leveling kit. Adjust the mount or rings until the bubble is centered, making sure the reticle is perfectly horizontal.
This step helps prevent canting, which can lead to inconsistent shots. Double-check by looking through the scope and confirming the reticle’s horizontal lines are parallel to the rifle’s bore.
Proper leveling ensures your shots stay on target during long-distance shooting and makes it easier to adjust for windage and elevation later on.
Testing Your Scope at the Range and Fine-Tuning
Once your scope is properly leveled, it’s time to head to the range and put your adjustments to the test. Start by shooting at a target 25 to 50 yards away to check your point of impact. Then, make small tweaks to your scope’s windage and elevation dials based on where your shots land.
Focus on a few key steps: use a stable shooting position for consistent results, take multiple shots to see if your grouping shows a pattern, and record your initial adjustments for future reference. Adjust in small increments so you don’t overshoot.
Check your eye relief and make sure your sight picture stays comfortable and consistent. Fine-tuning takes patience, but it’s worth it. With practice, your scope will be dialed in for accurate, reliable shooting.
Troubleshooting Common Rifle Scope Alignment Problems
Even with careful setup, you might run into common rifle scope alignment issues that can mess with your accuracy. One common problem is a misaligned reticle, which can cause your shots to drift away from the target.
To fix this, make sure the scope is mounted properly and securely, then re-zero it. Another issue is scope drift or movement during shooting, often caused by loose mounts or rings.
Tighten all mounting hardware, but be careful not to over-tighten, as this can damage the scope. If your shots are consistently off at different distances, check your scope’s eye relief or parallax adjustment.
Regularly inspecting your mounts and keeping them tight can prevent many alignment problems. This helps keep your shots accurate and consistent.
Frequently Asked Questions
How Often Should I Realign My Rifle Scope?
You should realign your rifle scope whenever you notice your shots aren’t hitting the target, especially after rough handling or hunting in tough conditions.
It’s a good idea to check your scope’s alignment every few months and after any impact or drop.
Keeping your mounts tight and lenses clean also helps prevent misalignment and keeps your shots accurate and consistent over time.
What Tools Are Best for Scope Alignment?
You should use tools like a bubble level, a reticle alignment tool, and a torque wrench for scope alignment. A bubble level helps guarantee your rifle is perfectly level, making sure everything is straight.
A reticle alignment tool allows precise adjustments of the crosshairs, ensuring your scope is properly centered. The torque wrench makes certain your scope screws are tightened to the manufacturer’s specifications, preventing shifts.
These tools make the process accurate and straightforward, helping you achieve the ideal alignment for better accuracy.
Can Scope Misalignment Affect Long-Range Shooting Accuracy?
Yes, scope misalignment can really impact your long-range shooting accuracy. When your scope isn’t properly aligned, your shots won’t hit where you expect them to, especially at longer distances.
You might notice your shots aren’t grouping well or drifting off target. To improve your precision, always double-check your scope’s alignment before shooting long-range. Make adjustments as needed to keep your shots accurate over greater distances.
Is It Necessary to Re-Zero After Aligning the Scope?
Yes, it’s necessary to re-zero your rifle after aligning the scope. When you make adjustments to correct alignment, it shifts your point of impact.
To confirm accuracy, you should fire a few test shots and fine-tune your scope’s zero point. This process ensures your scope and rifle work together perfectly.
It helps you hit your target consistently at various distances. Proper re-zeroing is essential for precise long-range shooting.
How Do Environmental Factors Impact Scope Alignment?
Environmental factors like temperature, humidity, wind, and atmospheric pressure can really affect your scope’s alignment.
Temperature changes cause metal to expand or contract, which impacts zero point accuracy. Wind can sway your shot, making it seem like your scope is off.
Humidity and pressure influence air density, which changes the bullet’s trajectory.
To stay accurate, it’s a good idea to check and adjust your scope regularly, especially when environmental conditions shift significantly.
Conclusion
Now that you’re armed with these eight simple steps, your rifle scope will be as aligned as a laser beam—no more excuses at the range. Just remember, perfect precision isn’t magic; it’s patience, a steady hand, and maybe a little stubbornness.
So go ahead, fine-tune that scope, and watch your shots hit dead center like a pro. After all, why settle for “close enough” when you can be spot-on every time?