8 Simple Steps to Remove Your Gun Safe Door
Many people struggle with safely removing their gun safe door, especially if they’re unsure where to start. You’re not alone—this can be a tricky task if you don’t know the proper steps. But don’t worry, with a little guidance, you can do it safely and effectively.
To remove your gun safe door, first guarantee safety by unplugging the safe, removing firearms, and wearing protective gear.
Next, empty the safe completely and gather your tools.
Inspect hinges and fasteners to identify screws or bolts, then carefully detach the hinges while supporting the door’s weight.
Handle the door gently to avoid damage, and once removed, align it properly for reinstallation if needed.
Keep in mind these steps for safe, effective removal—more helpful tips are just ahead.
Key Takeaways
- Ensure safety by unplugging the safe, removing firearms, and wearing protective gear before starting.
- Empty the safe completely, removing all firearms and accessories carefully.
- Use a flashlight to identify hinge fasteners, screws, and locking mechanisms for better visibility.
- Detach hinges by removing screws or bolts, but make sure to support the door’s weight as you work.
- Once all fasteners are removed, carefully maneuver and lift the door away from the safe.
Ensure Safety Before Starting

Before you start removing the gun safe door, it’s important to prioritize safety. Make sure the safe is unplugged if it’s electric or connected to a power source.
Prioritize safety by unplugging the safe and ensuring no firearms or ammunition are inside before removal.
Check that no ammunition or firearms are inside or nearby to avoid any accidental discharges. Wear safety gloves and eye protection to guard against sharp edges or debris.
Clear the area around the safe by removing any obstructions or tripping hazards. If the safe is heavy, consider getting help or using proper lifting techniques.
Once the door is detached, double-check that it’s securely supported so it doesn’t fall unexpectedly. These precautions help keep you safe and prevent damage during the removal process.
Prepare and Empty Your Gun Safe
Before removing the door, you need to clear out everything from the safe. Take out all firearms, accessories, and any other items inside.
Make sure the safe is accessible and empty. This will help guarantee a safe and easy removal process.
Clear Out Safe Contents
Start by removing all items from your gun safe, handling firearms safely and responsibly. Empty the safe completely, including any ammunition, cleaning supplies, or personal belongings.
Check each item carefully to ensure firearms are unloaded and stored separately if needed. Place all contents in a secure area away from children or unauthorized persons.
While clearing out the safe, inspect for any damage or rust that might need attention before reassembling or storing items elsewhere. Removing everything makes it easier to access the interior and prevents accidental damage or injuries.
Keep a list of items if you plan to reorganize or replace contents later. Thoroughly clearing out the safe sets the stage for safe, efficient safe door removal and future maintenance.
Remove Firearm Accessories
Once you’ve emptied the safe of all general contents, turn your attention to removing firearm accessories. Carefully take out all magazines, holsters, slings, and any cleaning supplies stored inside.
Check for small parts like extra sights, grips, or attachments that might be attached to your firearms. Remove any safety locks or other accessories that could impede safe removal of the door.
Be gentle to avoid damaging the interior or scratching surfaces. If you have lock boxes or additional compartments, empty those as well.
Organize and set aside these accessories so they won’t get misplaced during the safe door removal process. Ensuring all accessories are removed helps prevent damage and makes the door easier to handle safely.
Ensure Safe Is Unlocked
To guarantee safety during the removal process, make sure your gun safe is accessible and empty. Confirm the safe is open so you can access it easily without forcing the door, which could cause damage or injury.
Remove all firearms, ammunition, and accessories beforehand to prevent accidents. Think of the safe as a secure vault with the following:
- An empty, clean interior free of items
- An open latch or combination dial turned to the open position
- No firearms or ammunition inside
- A clear, accessible opening
Double-check that the safe is fully open and empty before you proceed. This helps minimize risks and makes removing the door smoother, safer, and more efficient.
Safety first: an empty, open safe is the foundation for a trouble-free process.
Gather the Necessary Tools for Door Removal
Gather the necessary tools for door removal, like screwdrivers, wrenches, and any hardware your safe’s manufacturer recommends.
Make sure to wear safety gear such as gloves and eye protection to keep yourself safe while working.
Double-check that you have all the required hardware ready so you won’t have to stop once you start.
Identify Required Tools
Gathering the right tools is key to removing your gun safe door safely and efficiently. Before you start, make sure you know which tools you’ll need to avoid delays or causing damage.
Usually, you’ll need a few basic items: a socket wrench set for loosening bolts and screws, a flat-head screwdriver for prying or unscrewing parts, and an Allen wrench or hex key if your safe uses these fasteners.
Don’t forget a sturdy pair of gloves to protect your hands during the removal process. Having these tools ready will help you work smoothly without interruptions.
Check your safe’s manual or inspect the hardware on the door to confirm exactly which tools are necessary. Being prepared with the right equipment makes the whole process safer and more straightforward.
Prepare Safety Gear
Having the right safety gear is essential before you start removing your gun safe door. You want to protect yourself from potential injuries, so gather gloves to shield your hands from sharp edges and debris.
Safety goggles are important to protect your eyes from dust or accidental sparks if you’re using drills or power tools. Wearing a dust mask helps prevent inhaling any particles or fumes.
If you’re working with power tools, consider ear protection to guard against loud noise. Make sure your work area is well-lit and free of obstructions.
Keep a sturdy pair of work gloves nearby for handling rough surfaces. Having these safety items ready ensures you can focus on the task safely and efficiently without risking injury.
Gather Necessary Hardware
To successfully remove your gun safe door, gather all the necessary tools and hardware beforehand. You’ll need specific items to make the process smooth and safe.
Prepare a socket wrench set to loosen bolts, a flat-head screwdriver for prying, a pair of gloves for protection, and a flashlight to see clearly in tight spaces.
Visualize the task: the socket wrench will handle stubborn bolts, the screwdriver will help with clips or brackets, gloves protect your hands from sharp edges, and the flashlight illuminates dark corners.
Having these tools ready guarantees you won’t waste time searching mid-procedure. Double-check that you have everything before starting so the removal process is efficient and safe.
Proper preparation minimizes frustration and reduces the risk of damage.
Identify Fasteners and Locking Mechanisms
Before attempting to remove the gun safe door, you need to identify the fasteners and locking mechanisms securing it in place. Carefully inspect the edges and hinges of the door for screws, bolts, or pins.
These fasteners may be hidden behind panels, covers, or foam padding, so look closely. Check for locking mechanisms, such as latch bars or locking bolts, that engage when the safe is secured.
Use a flashlight if necessary to see into tight spaces. Note the type of fasteners—are they Phillips head screws, hex bolts, or something else?
Understanding what holds the door in place helps you plan the right tools and approach. Proper identification prevents damage and makes the removal process safer and smoother.
Detach the Hinges and Remove the Door
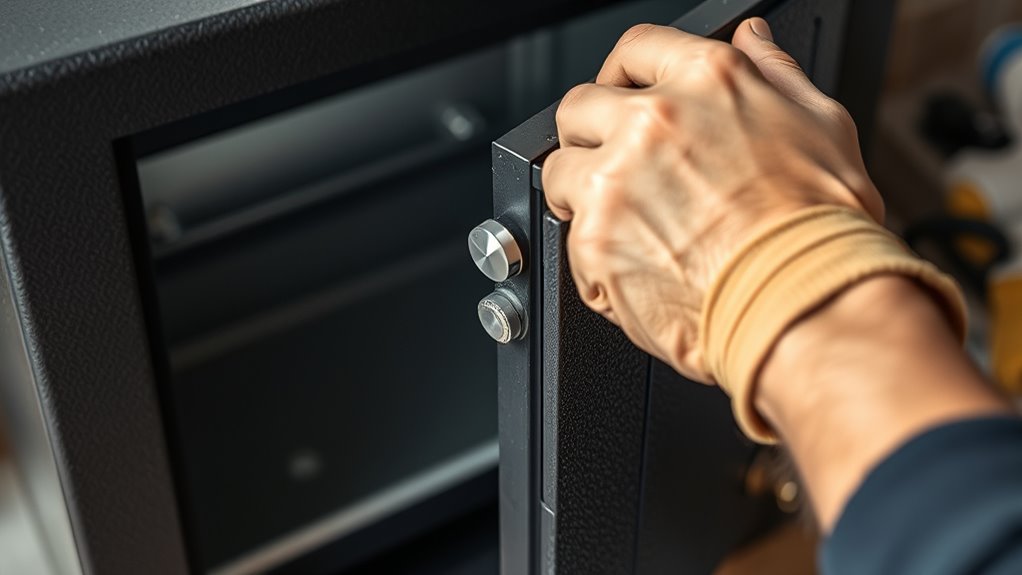
With the fasteners and locking mechanisms identified, it’s time to detach the hinges holding the door in place. Start by inspecting the hinges to see if screws or bolts are securing them.
Use the right screwdriver or wrench to remove these fasteners, and keep them safe for reinstallation. Once the hinges are free, gently support the door’s weight as you lift it away from the safe body.
Use the proper tools to remove fasteners and carefully support the door during removal.
Visualize the hinges firmly attached to both the door and the safe frame. You’ll see screws or bolts ready to be unscrewed. The door may tilt slightly as it begins to come loose.
Grasp the edges securely with your hands as you lift. Carefully maneuver the door away from the safe, making sure not to damage the hinges or surrounding surfaces.
Handle the Safe Door Carefully to Avoid Damage
Handle the safe door gently as you remove it to prevent any accidental damage to the door, hinges, or surrounding surfaces. Use steady, controlled movements and avoid forcing the door, which could cause dents or scratches.
Support the weight of the door with both hands, especially if it’s heavy, to maintain control. Keep the area clear of obstacles to avoid bumping or dropping the door unexpectedly.
Pay attention to the hinges and any mounting points, making sure you don’t yank or twist them abruptly. If the door feels stuck, double-check that all fasteners are removed and that you’re not applying excessive force.
Taking your time and handling the door carefully helps prevent costly damage and makes the removal process safer.
Reinstall or Reassemble the Safe Door Properly
Start by carefully aligning the door with its hinges and mounting points, making sure all parts fit snugly. Once aligned, gently slide the door into place, ensuring the hinges engage properly. You want the door to sit flush and open smoothly without gaps.
Check that the locking bolts and mechanism are correctly positioned and working well. When reassembling, tighten screws or bolts securely but avoid over-tightening, which can cause damage. Make sure the door opens and closes easily with no sticking or misalignment.
Make sure hinge pins are properly seated and secured. Confirm all screws or bolts are tightened evenly for a solid fit. Test the locking mechanism to ensure it operates smoothly. Finally, inspect the door’s alignment from multiple angles to be sure everything is perfect.
Tips for Securing and Maintaining Your Safe After Removal
After removing your safe, it’s important to secure it properly and keep it in good shape. If you plan to store it temporarily or permanently out of sight, pick a secure, hidden spot.
Anchor the safe to the floor or wall to prevent theft or accidental tipping. It’s a simple step that makes a big difference in safety.
Regularly check the locking mechanisms, hinges, and exterior for any signs of wear or damage. Fix issues quickly to keep everything working smoothly.
Keep the safe dry and clean. Use a damp cloth to wipe away dust and dirt, and apply lubricant to moving parts when needed.
If you’re not using the safe for a while, cover it to protect against dust and moisture. Proper care and security will help your safe last for years.
Frequently Asked Questions
Can I Remove My Gun Safe Door Alone Without Assistance?
Yes, you can remove your gun safe door alone, but it really depends on the size and weight of the safe.
Make sure you have enough space and the right tools like a screwdriver or wrench. Carefully open the safe and find the hinges or locking mechanism.
Follow the manufacturer’s instructions closely. Be careful because the door can be heavy and awkward to handle on your own.
If it feels too cumbersome, don’t hesitate to ask for help to avoid injury.
What Are Common Mistakes to Avoid During Door Removal?
Ever wonder what could go wrong during door removal? You should avoid forcing the door, as it can damage hinges or the safe itself.
Don’t rush the process or skip marking the hinges, which helps during reinstallation. Over-tightening bolts or ignoring safety precautions can cause accidents.
Stay patient, follow instructions carefully, and use proper tools. Are you prepared for potential mishaps?
Taking your time guarantees safe, successful removal without costly mistakes.
How Do I Ensure the Safe Remains Secure After Door Removal?
To ensure your safe stays secure after removing the door, start by double-checking that all locking mechanisms are fully engaged and working properly. It’s a good idea to give everything a thorough inspection.
You should also reinforce the door frame or replace any worn-out hinges to prevent accidental opening. This helps keep your safe secure even without the door in place.
Think about adding an extra locking system or security measures like alarms for added protection. These extra steps can give you peace of mind.
Make sure to regularly check the safe for signs of tampering or wear. Keeping an eye on it helps maintain its security over time.
Are There Specific Tools Recommended for Different Safe Models?
Think of it like “the right tool for the right job.” You’ll want a Phillips head screwdriver for most safes, but some models need a flat-head or an Allen wrench.
Check your safe’s manual or the manufacturer’s website for specific recommendations. If you’re unsure, calling customer support can save you from unnecessary damage.
Using the correct tools makes the removal process smoother and helps keep your safe in good shape.
What Safety Precautions Should I Take During Reinstallation?
You should always wear gloves and safety goggles to protect your hands and eyes during reinstallation.
Make sure the safe is unplugged and stable before you start working.
Keep small parts and tools organized so you don’t lose anything.
Work in a well-lit area and handle the door carefully to avoid injury or damage.
Follow the manufacturer’s instructions closely to ensure safety and proper alignment during reinstallation.
Conclusion
Now that you’ve safely removed your gun safe door, make sure to keep the keys or combination secure. Think of it like a knight guarding their treasure chest.
Handle the door with care—no need to treat it like the fragile glass slipper from Cinderella. Regular maintenance will keep your safe in top shape.
This way, your valuables stay protected. With these simple steps, you’ve taken control and turned your safe into a fortress ready to face any challenge.