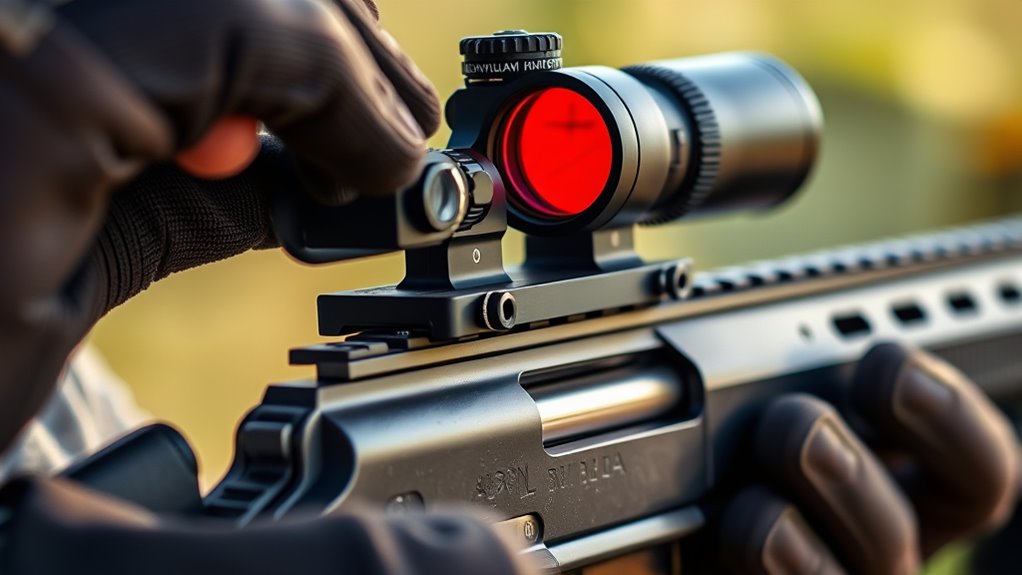
How to Bore Sight Your Red Dot Sight: A Step-by-Step Guide
Many shooters find bore sighting their red dot sight to be a tricky and sometimes frustrating process. You’re not alone—getting that perfect alignment can feel like a challenge, especially if you’re new to it.
But with a little guidance, you’ll be able to do it quickly and confidently.
To bore sight your red dot sight, start by securing your rifle on a stable rest and guarantee it’s unloaded.
Remove the sight and align the reticle with the bore, making small adjustments to windage and elevation.
Use a bore sight tool or target for initial alignment.
Fine-tune the settings and test fire at the range, making precise adjustments for accuracy.
Keep practicing these steps, and you’ll master the process for a quick, confident zeroing experience.
Key Takeaways
- Secure the firearm and make sure it’s unloaded before you start bore sighting.
- Attach the red dot sight and align it with the bore using a bore sighting tool or laser.
- Make small adjustments to windage and elevation based on the bore alignment.
- Confirm the sight’s accuracy by shooting at a distant target. Then, adjust the sight as needed.
- Regularly check and maintain your sight to keep it accurate and ensure clear optics.
Why Bore Sighting Boosts Your Shooting Accuracy
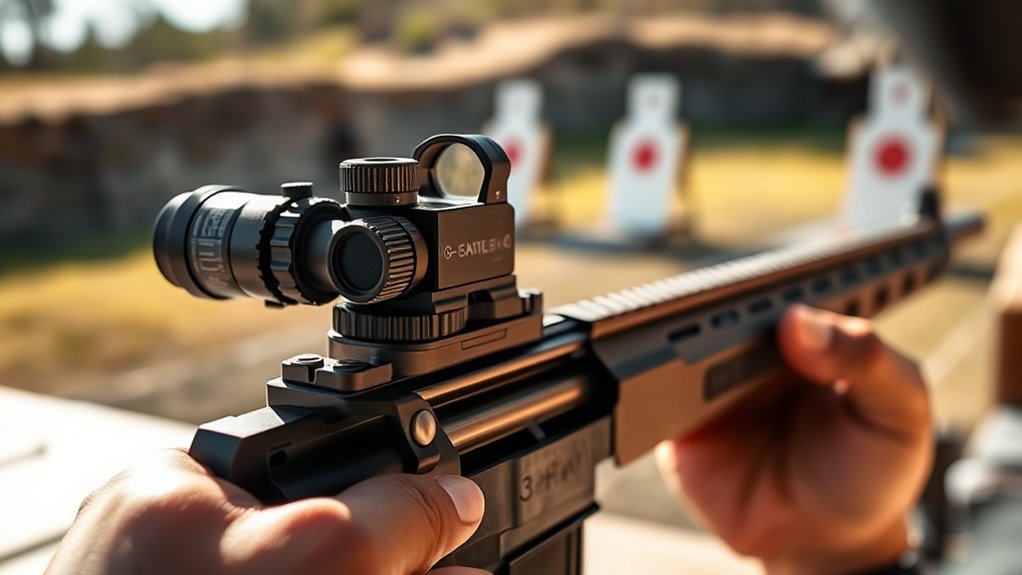
Bore sighting greatly improves your shooting accuracy by aligning your red dot sight with your firearm’s barrel, making sure your point of aim matches where the bullet will hit.
When your sight is properly aligned, you’ll notice fewer missed shots and more confidence in your shooting. It also reduces the need for extensive adjustments at the range, saving you time and ammo.
By getting the sight aligned first, you can focus on fine-tuning your shot placement instead of compensating for misalignment. This process helps you understand how your firearm behaves and where your shots are going.
Essential Tools and Equipment for Bore Sighting
To get started with bore sighting, you’ll need some specific tools and equipment to guarantee your sight is aligned accurately. First, a bore sighting tool designed for your rifle caliber is essential; it helps simulate the barrel’s line of sight.
You’ll also need a stable shooting rest or bipod to keep your rifle steady during the process. A flashlight or laser pointer can assist in aligning your sight with the bore sight’s laser.
Furthermore, have a clean cloth or lens cleaner to make sure your red dot sight’s glass is spotless for clear sighting. Finally, if you’re using a laser bore sighter, batteries are necessary to power the device.
These tools make certain your bore sighting process is precise and efficient, setting a solid foundation for accurate zeroing.
Preparing Your Rifle and Red Dot Sight for Accurate Zeroing
Before you start zeroing your red dot sight, make sure your rifle and sight are properly prepared. This helps ensure accurate results and makes the process go faster.
Begin by cleaning your rifle’s bore and checking that all moving parts are well-lubricated. Attach the red dot sight securely, making sure it’s mounted correctly and tightened according to the manufacturer’s instructions. Confirm that your rifle is unloaded and on safe.
Next, check that the sight’s battery is fresh and that the reticle is clear and properly aligned. Finally, make sure your shooting environment is suitable—flat, stable, and free of distractions.
Securing Your Rifle in a Stable Shooting Position
To get the best results, you need to secure your rifle in a stable shooting position. Use a solid surface and proper support to keep your firearm steady.
Avoid unnecessary movement during setup because it can throw off your aim. This stability helps ensure your bore sighting is accurate and repeatable.
Use a Stable Surface
Securing your rifle on a stable surface is key for accurate bore sighting. A steady platform helps you keep everything aligned and reduces movement.
Find a flat, solid surface like a workbench or table to rest your rifle on. Using supports or sandbags will help eliminate any wobble or shifting.
Make sure the rifle is fully supported at the stock and forend to prevent sagging. Keeping a comfortable, steady shooting posture also makes a big difference.
Stability ensures your sights stay aligned during the process, saving you time and frustration.
Ensure Proper Rifle Support
Proper rifle support is essential to keep your firearm steady during bore sighting. You want minimal movement to guarantee accuracy when aligning your red dot sight. Use a sturdy bipod, sandbags, or a rifle rest to stabilize your weapon.
Adjust the support to eliminate any wobble or shifting during the process. Proper support reduces fatigue and keeps your sights aligned precisely. Keep the rifle’s stock firmly against the support to prevent any unwanted movement.
Minimize Movement During Setup
Once your rifle is supported, focus on minimizing movement during the setup process. Keep your grip steady and your body relaxed to avoid unnecessary shifts.
Make sure the rifle stays locked in a stable position so your aim remains consistent. Small adjustments can throw off your bore sight, so move deliberately.
Use a solid rest or sandbags if you have them, and avoid leaning or twisting. Keep your elbows tucked in and find a comfortable stance to reduce muscle fatigue.
Secure the rifle firmly without over-tightening. Use a stable surface or bipod for extra support.
Keep your breathing steady and controlled. Avoid talking or making sudden movements during setup.
Aligning the Red Dot Sight With the Bore
To align your red dot sight with the bore, start by securing your firearm in a stable position.
Next, carefully adjust the sight until it lines up with the bore, making sure both are centered.
Finally, verify the alignment and make precise fine-tuning adjustments for accurate shooting.
Secure the Firearm Properly
Secure your firearm firmly in a steady vise or mount to prevent any movement during the bore sighting process. Stability is key for accurate adjustments and safety.
Once secured, double-check that the firearm isn’t shifting as you work. Always keep the firearm pointed in a safe direction.
Verify all screws and mounts are tight before proceeding. Using a stable platform helps you make precise adjustments without frustration or errors.
Remember, any movement can misalign your sight, which means rework. Take your time to confirm everything is secure.
A steady setup guarantees your red dot sight will be aligned correctly with the bore, saving you time and ensuring accuracy in the next steps.
Proper security is the foundation of successful bore sighting.
Align the Bore and Sight
Start by removing the red dot sight from its mount and placing it on a flat, stable surface where you can easily see through the lens. Look through the sight and align its reticle with the bore of your firearm.
If your sight has adjustment knobs, note their current positions so you can return to them if needed. Carefully center the reticle on a target or a fixed point that lines up with the bore’s axis.
Make small, precise adjustments to the sight’s windage and elevation until the reticle and bore are perfectly aligned. This step ensures the sight’s point of aim matches the bore’s line of fire, setting a solid foundation for accurate shooting.
Verify and Fine-Tune Position
Carefully verify that the reticle stays aligned with the bore by looking through the sight and checking the point of aim against a distant target. If you notice any deviation, make small adjustments to the sight’s windage and elevation screws.
Take your time with these adjustments to ensure your red dot lines up perfectly with the bore. This will help improve your accuracy and shot placement.
Make small, precise tweaks, then recheck the alignment to confirm it’s correct. Regularly verify the reticle’s position as you fine-tune, since even tiny misalignments can affect your shot.
Remember to use a stable shooting rest for better accuracy. Make adjustments gradually to avoid overshooting your target.
After each tweak, recheck the alignment to keep everything consistent. If possible, confirm the setup at multiple distances for the best results.
Using a Bore Sight Tool or Target to Get Started
To start bore sighting your red dot sight, you can use either a bore sight tool or a target at a known distance.
A bore sight tool attaches directly to the barrel, aligning the sight with the bore, which makes it easier to get your red dot roughly centered.
Alternatively, you can set up a target at a specific distance, like 25 yards, and visually align the red dot with the target’s center.
If you’re using a bore sight tool, insert it into the barrel and turn it on to see where the laser points.
For a target, position your firearm securely and look through the sight to roughly align the dot with your aiming point.
Both methods give you a good starting point before fine-tuning.
Making Fine Adjustments to Your Red Dot for Precise Zero
Adjusting your red dot for a precise zero means making small, incremental tweaks to its windage and elevation controls. These little adjustments help you line up the dot exactly where you want your shots to hit.
Start with slight turns—usually a quarter or half a click at a time—and test your aim after each tweak. Keep an eye on how your shots pattern on the target; consistency is key.
Remember, tiny adjustments can make a big difference in accuracy. Use a target with clear, visible markings to track your changes.
Make adjustments in small, controlled increments and focus on one control at a time to avoid confusion. Keep track of your adjustments so you can replicate or fine-tune them later.
Confirming and Fine-Tuning Your Zero at the Range
Once you’ve made your initial adjustments, it’s important to confirm your zero at the range. Do this by shooting a series of shots and checking where they hit on your target.
Start with a clean, clearly marked target at your chosen distance. Fire a group of shots and observe the impact points. If they’re clustered but off-center, note which way and how much you need to correct.
Use your red dot adjustments to bring the group onto the target’s center. Repeat this process, making small tweaks each time, until your shots consistently hit your desired point of impact.
This step helps verify your sight is properly zeroed, giving you confidence that your shots will land where you want. Fine-tuning at the range ensures your accuracy in real shooting situations.
Troubleshooting Common Bore Sighting Issues and Tips for Success
Even after carefully zeroing your red dot sight, you might run into common issues that can mess with your accuracy. Luckily, most of these have simple fixes once you know what to look for.
First, check if your sight is securely mounted. A loose or shifted mount can throw off your aim pretty quickly. Make sure everything is tight and hasn’t moved during handling.
Next, consider parallax errors. If your eye position isn’t consistent, it can cause accuracy problems. Keep your head steady and aligned with the sight for the best results.
Consistent eye position prevents parallax errors and keeps your shots on target. Stay steady and aligned with your sight.
Don’t forget about dirty lenses. Dust, smudges, or glare can make your sight blurry or hard to see through. Regular cleaning will keep your view clear and your shots on target.
Finally, pay attention to your shooting stance. An inconsistent grip or stance can affect your shot reliability. Maintain a steady, comfortable position each time you shoot for best accuracy.
Frequently Asked Questions
Can Bore Sighting Be Done Without Removing the Rifle’s Scope or Sights?
Yes, you can bore sight without removing your rifle’s scope or sights.
You usually use a bore sighting tool that attaches to the muzzle or slides into the chamber, aligning with the bore.
This allows you to adjust your red dot sight to match the bore’s alignment without taking off any existing sights or the scope.
It’s a quick and convenient method that saves you time and keeps your scope’s zero intact.
How Often Should I Re-Bore Sight My Red Dot Sight?
You should re-sight your red dot sight whenever your shots start to drift off target, usually after about 500 to 1,000 rounds or if the sight takes a hit.
Interestingly, even small vibrations can cause slight misalignments over time. Regular re-sighting helps keep your shots precise.
Make sure to check your zero periodically, especially after cleaning, transporting your firearm, or if environmental conditions change. This ensures your aim stays accurate and reliable.
Is Bore Sighting Effective for Long-Range Shooting?
Bore sighting can be helpful for long-range shooting, but it’s not foolproof. It helps you quickly line up your red dot with your rifle’s bore, saving time at the range.
That said, for precise long-distance shots, you’ll still need to fine-tune your sight through actual shooting and adjustments. Think of bore sighting as a good starting point that gets you close.
But don’t rely on it alone for ultimate accuracy at extended ranges. It’s a helpful first step, but final precision comes from shooting and making adjustments.
Can I Bore Sight Indoors or Only Outdoors?
Bore sighting is like tuning a musical instrument—you want everything aligned perfectly, whether indoors or outdoors.
You can indeed bore sight indoors, as long as you have a clear, flat surface and a proper target. Just be mindful of your surroundings and lighting conditions.
Indoors, you might need a bit more patience to ensure your red dot aligns correctly, but with careful setup, you’ll get precise results without stepping outside.
What Safety Precautions Should I Take During Bore Sighting?
You should always prioritize safety when bore sighting. Wear eye and ear protection to guard against any unexpected debris or noise.
Verify your firearm is unloaded and the safety is engaged before starting. Keep the firearm pointed in a safe direction at all times, and avoid distractions during the process.
If you’re indoors, make sure the area is well-ventilated and free of obstructions. Never rush—take your time to prevent accidents.
Conclusion
Now that you’ve mastered bore sighting, you’re ready to aim with even greater precision and confidence. Think of it as tuning a fine instrument—each adjustment gets your shot closer to perfect harmony.
With patience and practice, your red dot will dance exactly where you want it, turning your rifle into a natural extension of your aim.
So go ahead, get steady, and let your sights sing true. Your next perfect shot is just a bore sight away.